Showing posts with label Harry Mok. Show all posts

Tuesday, November 20, 2012

How to be Pro!

As I type this, I'm uploading the latest batch of samples I've been cutting for this project called Hoopfighter.
This project has been in "concept" for a long, long time according to a close friend of mine who is the creator of the IP.  They've gotten quite a comic strip started online. I'm helping out with Sound Effects for the next phase they're building: a short animated series.  I've been told the plan is to start releasing episodes as early as next April.  Check them out on Facebook and join the following so you can stay in the loop on when episodes are released!

I've been doing an awful lot of documenting my own personal stuff as well as stuff I've been doing for this project just to keep track, which led me to that template I designed for managing field recording sessions with the Zoom H4N.  (you can find it here on my article "Got Zoom?")

Universal Audio has AMAZING documentation and their manual provides a session recall sheet on page 35.  I love my 4-710 D.  In fact, I've used this beast so many times I've lost count (thankfully I keep session logs), but I just started backing up my paper logs back to digital domain and storing them in PDF's along with my other session logs.  Thanks to the power of Photoshop I now have this master template for doing session recall sheet "digitization".  Click on the image below to download the .PSD file.
Here's a few tips on how to edit and navigate this photoshop file.

Layout contains the altered session recall sheet from UA's manual.

Channel Notes contains text layers for each channel of both the top and bottom recall layouts.  Simply double click on the text layer and start typing your information about that channel.  What mic was hooked up, whether the mic's pad or roll-off or other switches or pattern select was used.

Session Title contains the upper text layers,  double click on the "TITLE" layer and start typing out the title of the session.  It also houses the date text layer, and the engineer text layer.  You can change your studio title as well.

Notes area is something I added in.  there's 2 vector lines and a text layer for adding in further text information about the session.

Dials which you can see all the layers of in the image to the right, contains an easy way to create the dial drawing information.  Simply select the hard circular brush (or default brush Photoshop uses).  and make the brush size small enough to your liking.

As you can see above, I started painting in on the appropriate layer.  The easiest way to keep a clean look, is to click once and create a dot at the center of the dial with the brush tool, then hold Shift and left click at the outer edge of the dial to create a straight line from the last "click" you made.

My finished example below from one of my earlier sessions.

So there you have a free Photoshop template, and a basic walkthrough of how to use it for your own sessions.

This isn't all I've been up to.  I've made session time log templates, material checklist templates, Sample archiving templates, etc... etc...  I've spent just about as much time building documentation as I have actually recording and producing audio material!  Imagine that...

Other news, I've been working off-and-on for a DJ friend of mine helping him change aliases and start a new "brand image" building marketing material and video work for his music.  Check out VRTRA on facebook and show him some love!  He's got an EP he's working on right now.  I actually mastered his track "IDGAF (Original mix)".
We've been back and forth with development of the text logos and stripping out a "zebra" design he originally had made by another artist and wants to shift gears to a more edgy look.  Here's a look at the progress and changes I've done just iterating through some design requests.


 Some alternate text banners he decided against.


After a week or so He decided the Zebra head wasn't the image he wanted, but he liked the idea of fractals and wanted them to shape the V as his logo.  I had a couple of issues with this as getting the same way I designed the fractals as BG fx for the Zebra head don't work with text well, so I had to imrpovise.
After some more chatting back and forth and letting him know my difficulties with getting the same geometric shaped fractals to work with the V, I took some more creative liberties to develop some different looks for the V.

Just some super rough ideas for a background V shaped fractal.  I've designed my fair share of fractals with Apophysis and just started manipulating them in Photoshop to get the V look.  But this still wasn't what he envisioned so I took a new approach with the Geometric shape fractals I had created with the Zebra head.


More news to come with several other projects I'm involved in.  Shot video and assisted a photographer friend at a Wedding over a month ago.  I should be getting the footage and some photos to post up for the work we did soon.  Lots on my plate!  Also, if you haven't already, go back in my blog and check out my article on the latest commercial project I did music for: SIMple is as Simple does not.

Stay fresh friends.  As always, I appreciate any and all feedback, so feel free to comment below.  My question to you all is: what do you think o the V logos, which is your favorite? Do you think any of these make for a good logo design for a DJ?

Wednesday, August 29, 2012

How to The make The Cut


Building several commercial spots on the fly was a blast, and a challenge.  I had gotten a call from Harry just a couple days prior to the shoot day which was May 1st.  The idea was to go out to San Jose on short notice, and Harry already had the idea complete in his head so there would be no actual script or storyboard or shot list.

On May 1st, I got up super early to pick up a make-up artist acquaintance I had met through a mutual friend that does photography.  I was all the way out in Escalon (the opposite direction I needed to go) picking up Ava Nightingale who was to be our makeup artist for the day, then zoomed out to San Jose to meet at the Moda Italia store by 10 AM.  When we arrived there was no one even there which gave me and the makeup artist time to go to the nearest store and pick up some makeup supplies she needed.

When we got back Harry and Daren had just arrived and Daren was already dressed in a ninja costume.  Harry wanted to get rolling on shooting and thus Daren and I shot all the establishing ninja scenes where they pop from all corners of the store and converge on Cary and Harry sitting in the back room.

As we wrapped up those shots The other two extras arrived to begin dressing up as Ninjas and prep for the group shot..
Harry's favorite production method to keep time down and crew size minimal is shooting MOS.  So after getting all the takes of the ninjas approaching before they were to strip down for the next group shot of them having their clothes cut off, I took some time to get foley sounds of the footsteps and weapons.
Cary Tagawa arrived as we were setting up for these shots and proceeded to get him dressed and makeup.
Ava Nightingale working with Cary Tagawa.
Once Cary was dressed, I started getting feedback from Harry about the next shot while Melissa Andarmani (who works for Moda Italia) helped the ninjas get suited up for the next shot.
Harry had all the ideas in place for his "story" which is the ninjas coming out from all corners of the store and converging on Cary and Harry who are sitting in the back enjoying some quiet time.  He would tell me roughly what he wanted to see and I would get the camera position and dialed in.  On such a quick time-table, these shots were all done with a single T2i on a tripod, with no assist.  I have multiple SD cards and with the down-time between shots long enough to allow the camera to rest I kept swapping out cards to transfer to a laptop I brought with me.

During some of the down time I used to review shots, and I quickly noted that we had prepped a box of "clothing confetti" but never used in the shot for both the Ninjas and for Cary's slicing and dicing shot.  We ended up having to re-shoot both of those while we had our actors and extras on-set and in their clothing still.  Had I not reviewed the footage I would never have gotten those shots to help sell the effect of their clothes getting chopped off.
The other thing I've been aware of for some time now is that Troy's camera always produces a faulty pixel in the video image.  I've been unable to track down whether or not this was an issue up until my most recent shoot doing the Zombie Apocalypse Trailer  when I had the same issue regardless of switching out lenses.  Thankfully Tomas had let me borrow his T2i for use with that production.  This commercial project however would have to suffer the issue.

While it's not a complete nuisance, there were other issues with his camera.  His lens even though completely clean and free of artifacts presented focus problems, as if the only area in focus on the lens is slightly to the right of center, and it wasn't an issue with aperture settings or depth of field.  So in some of the shots you can tell I'm trying to get a focus I just can't get.  Unfortunately this was the only wide angle lens I had with me (much less had access to period).

Because of the quick pace of production with me and Harry handling it all, we ended up not using any of our lighting gear which we brought, and during the slicing and dicing scene with Cary, you can see the reflection of Vincent who's already fully clothed ready for the next shot, throwing the "clothing confetti" from off-camera into view to sell the effect of Cary slicing the clothes up.
Left circle: Vincent throwing the confetti.  Red arrow: pointing out the faulty pixel in the video.
Sometime after this we got to shooting the tag-lines with audio Cary was to deliver the brand at the end of the commercial with, and noted several good "lines" that Harry wanted to use in post later.
At this point I was using both SD cards, one in the camera, and one in my Zoom H4n.  I followed Harry's signals to get audio rolling, and worried about sync later in post.

The Zoom has some wonderful features like being able to record at 96k/24 bit but for this I opted to record at 48k/24 bit wave to allow me to capture the performance with not just my Rode NTG-3 (pictured above on a tripod and wind-jammer) but also the built-in stereo mic setup on the Zoom itself.  I placed the zoom a decent distance away from Cary and completely off-axis to his projection angle toward the camera to capture more of the room tone and ambiance should I need the material for anything in post.

The bikers arrived some time while we were wrapping up the master shots of Cary standing with the ninjas.  They had to dress down and get into their formal outfits for the master shots with Cary as well.  Then we quickly moved on to them with their clothes cut off from Cary's attack.  However, on this shot I never caught the fact that we didn't use the confetti and was stuck with the slightly less cohesive footage.
I personally would have liked to pick up a take for this as continuity for me felt broken.  To make matters worse, when we wrapped at 2:30 pm we never got any of the shots of the bikers in their original outfit pulling up to the store to intro them into the scene.

I noticed this and some other "shots" were missing when I got back home and started doing my dailies.  In the case of the digital workflow we're using, Dailies refers to bringing in the video files to my NLE and beginning the labeling and sorting and building rough timelines to get an idea of what the "sequence" will look like.

Immediately I called up Harry and let him know we needed to schedule a pick-up shoot which ended up being a week from that day (Tuesday the 2nd, the production day was Monday, May 1st).  This gave me time to build as much of the commercial as I could.  The way I work is by roughing in the scene for continuity, before I start trimming down for time considerations.

While we were able to get cooperation on the re-shoot, only Vincent could make it out for his "fitting" with Harry to get a pick-up shot we missed, Joneil couldn't make it out on that day.  For the bikers arriving out front of the store only 2 of the bikers could show up that day, and one of them was not from the original group, but another friend of the Biker that did show up for both days.

I was pretty happy with the results we got from the pick-up shoot day especially getting some nice audio for the bikes pulling up.  On top of that we were able to get the shot of the guys getting off the bikes and then heading into the store for the 60 second version.

There's lots more to discuss, up next I discuss the Post production workflow.  For more information and to see the commercials, go visit our site:  Neologic Studios.

Wednesday, August 15, 2012

Looking for work?

The last few weeks have been crazy trying to get things in order.  I've been rounding up projects, finishing up a couple in particular: The Arcade box Design for Mikey.  I've also finished a couple small projects: a video reel for a friend of mine Lauren, as well as Harry re-modeling a logo for an upcoming project he's been pushing forward on.  We're still waiting to wrap up the two commercial project campaigns I worked on back in May, but as soon as they're wrapped I'll have lots of updates.
1st design iteration
As I started to get more characters placed and sent the client a picture for reviewing on the "direction" he wanted the design to go, I was given instructions to lose the "logo" in the center and do more of a collage.
2nd design iteration
After updating the client again I got more information how how he wanted the collage to look, and he sent me a few for reference:
3rd design iteration
3rd design iteration update
Should have this project done this month, I've had the Dubstep remix on hold for a short while thought I'm still touching base with it and will be getting back to producing it very soon.  I've had to take care of some serious financial stresses and as soon as I can get myself situated in that area I'll have the ability to mentally focus the project down and have it released by the end of this year if all goes well!

I have a couple other growing projects, taking on a client / label that is going to start needing steady mastering work.  Will be mastering a project tomorrow, and negotiating for further projects down the line as well. 

The studio has some projects on the back-plate that might get moved back to the front of progress continues well with these I'm wrapping up.  A sample catalog is in the works, along with a roayltay free music elements catalog for game and interactive media developers. 

I'm going to announce this on here just as a "possibility" of opening up a new youtube section for Neologic Studios and producing a weekly series of DIY and tutorial videos for audio production.  There's no telling when / if this will happen, but the idea is that they would be short, concise videos that highlight a particular product in demonstration, used in a project we are working on, and give an in-depth look at it's use; to DIY projects and how-to's.  If this interests you, get some discussion going on this post's comment section!

Monday, July 23, 2012

Behind the Apocalypse

So by now, my trailer for the dubstep remix mashup of Rob Zombie tunage is passing 900 views!  I'm really surprised at how quickly this has spread!  However I know it's got a lot of confusion and curiosity surrounding it.  I'd like to clarify just what I'm doing both on the remix, as well as a breakdown of the work I did putting together the trailer spot.

Firstly, I intend to make an hour long mash-up that can be made available by the end of this year; as for how it will be available I'm not entirely sure just yet .

(If you want to support this project, please sign up on Rob's forums and support me on this topic here, you'll see what I'm trying to do).  

What is this mash-up?  I'm building my own remixes as I go, arranging the mash-up in one single project.   The Theme is that it's all Rob Zombie's music, hence the title "Zombie Apocalypse".  Pretty cool huh?


Let's rewind back to about the end of April.  I started a remix project to kind of play around with some dubstep techniques as Troy was doing a homework assignment making a remix of whatever he wanted, to submit for classes he was taking at Pyramind.  We had talked about it a week or so prior and then I had mentioned the idea of doing a "Zombie" remix to some other friends.  Then the dubstep practice project became a full-fledged idea and I thought, eh... why not?

I started working on it little bits and pieces at a time, and didn't really make much progress the first month or so.  It wouldn't be until June where I reached a 3-4 minute mark on the mashup arrangement that I really fleshed out all the details.  I've been busy working small jobs trying to keep income flowing: recording local clients, doing commercial video production as (paid) favors of Harry Mok.

July is already here and I needed to get some motivation behind this project, and decided the first week of July that I want to build a trailer to get some exposure going, and minimally "show-off" some of the completed sections I had built of the mashup.  Keep in mind it's still being built and there's hardly any mixing done on it!

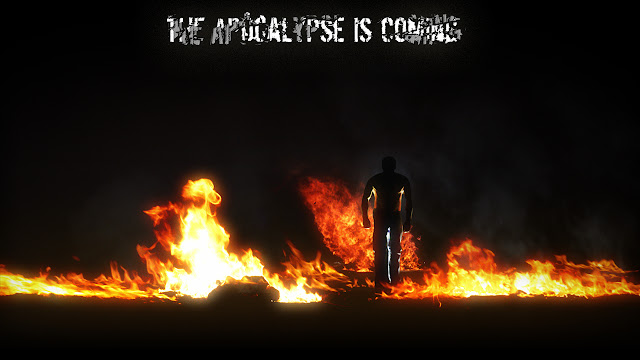
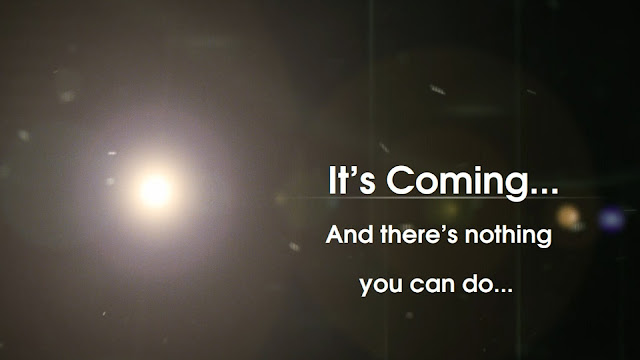
I had an inkling in my head of how I wanted the trailer to come across, and set about building the layout up in After Effects.  The first part was easy, simple intro playing off the theme idea for "Zombie" and end of the world theme: a cinematic optical flare with dust flying around in the air, as the camera pans downward to reveal a world in flames, with someone rising slowly in them.  At this moment I purely just jotted down the idea to come back to later on and try to tackle how I would build it.

Once some quick motion graphics were roughed out I had to plan out the rest of the trailer segments. I needed a "script".  What do I want the commercial to say?  What am I getting across?  Quick tip: Always keep a notepad and pen on your desk for quick jotting down of ideas.  I actually prefer this for day-to-day use as I often will write and re-write TO-DO lists of things on my plate I want or need to get done.  This keeps down on clutter on my screen as I used to prefer the Sticky Notes utility that comes with Windows 7.

As I built the trailer I went through about 3 versions of the script as I expanded on the content to fill 60 seconds of play.

There are a lot of video elements that are layered together and the hardest and probably the most complex part was the fire man segment with me standing up in the flames.  The first thing I built was the flame sequence.  Many video layers placed in 3d space within After Effects, along with separate smoke elements.

Once I got the rough camera motion down and timed everything out. I figured the opening sequence should take a total of 20 seconds even, and the fire segment making for a total of 7 of those seconds.

Timing has to match perfectly, and when it came time to shoot the plate I rallied in my favors I had been doing for the Mok family and they happily provided the lighting equipment and backdrop stands.  Mok and I went shopping for a backdrop cloth that I could use to block out the exterior location from my shot (I shot outside in front of my house at night).

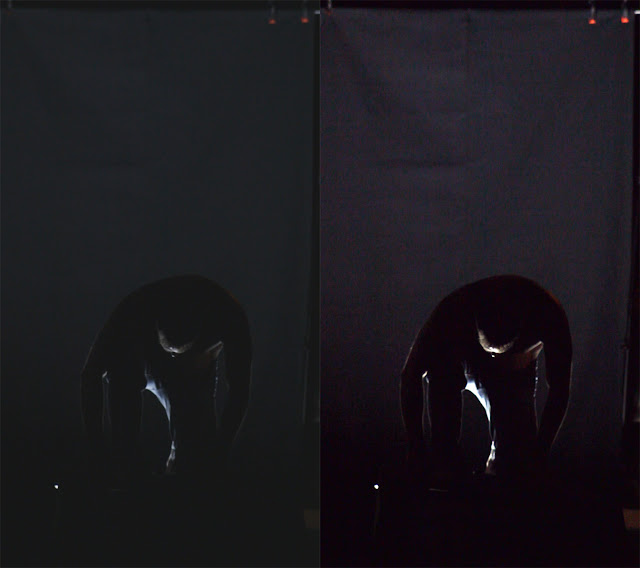
I called in another favor to a good friend of mine Tomas who let me borrow his DSLR as backup (which I ended up using as Troy's was having issues).  Michael Mok & I started setting up at about 9:30 pm.  You can see the setup below in the raw capture on the left and Photoshopped on the right.

Just a quick run-down of the "stage" layout: 

For the stage itself we used a cutting desk in the garage that has collapse-able sides and layed it on it's side, but that alone still wasn't tall enough to hide the softbox from the camera, so I grabbed two 2x4x8's that we had laying around because Troy and I have been busy building him a custom desk.  These raised it enough and kept it steady when I stood on it so it would not move.  

The black cloth I got just over 9 yards of in length and came at a decent width of 60".  This worked out perfectly as the backdrop stands we ended up having raised about 8+ feet in the air to cover not only my height for the angle of the camera but also accommodate the fact that the stage was increasing that height.

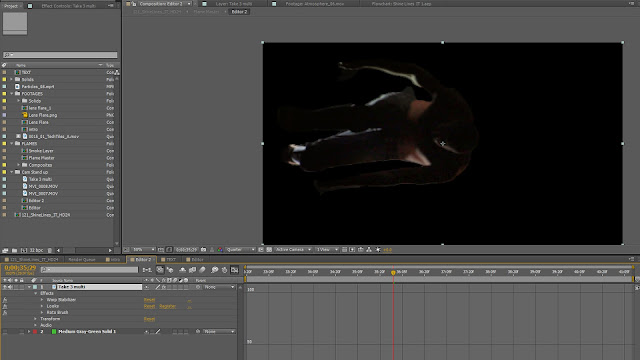
We did 3 sets, the first set of takes we brought inside immediately to ingest into After Effects to see how the footage looked.  I immediately noticed just how bad of camera shake there was even on a tripod.  As you can see from the screen grabs above we shot the footage vertically to maximize the use of space in the footage, which meant we couldn't use Mok's solid production tripod and instead had to shoot with a cheaper tripod.  It was windy out that night, and that coupled with a DSLR that weighs more than the tripod holding a camera vertically meant it would shake easily.  

Normally this kind of wind shake wouldn't be noticeable for a standard kit lens, but we were shooting with an older Canon EF 75-300mm that I borrowed from my older film canon SLR.

The last take on the last set was the final pick I ended up using to build the composition with in After Effects.  The first step was selecting out the clip segment I would use in the timeline and trimming out the rest, then warp stabilizing the footage.
The Rotobrush was then used to comp out the background.  This took quite a bit of work as I manually went in on a lot of the frames to get close to the look I wanted making sure the brushing worked to my advantage and wasn't too crisp or too blurry letting in any background.
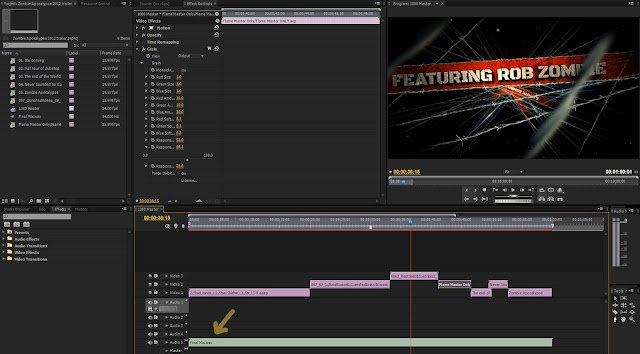
In Premier Pro you can see how the final timing of the sequence looks.  Notice only 1 audio track which says final mix. 
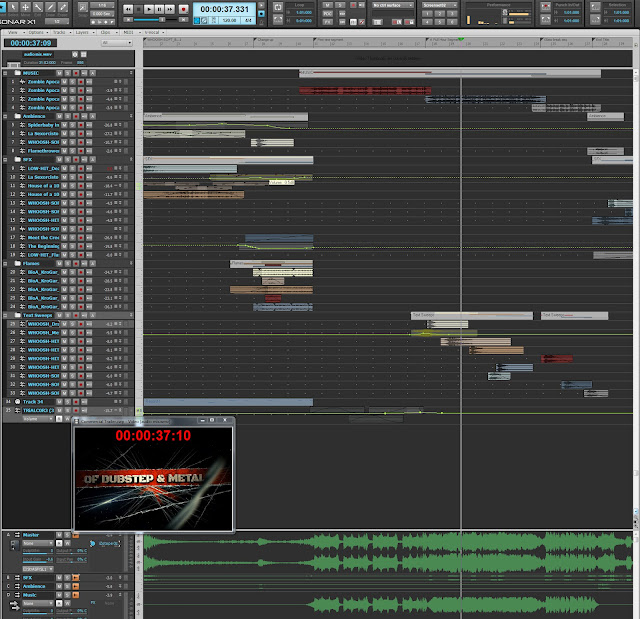
What I normally do with Premier is export out to OMF whatever audio is in my sequence if i'm working with video files that have audio (DSLR's, or synced Zoom H4n handheld recorder samples).  In this case, I simply render a WMV at 720p low quality but decent enough to work in Sonar with.
By the time I got down to doing the final iteration with the last after effects segment I had built, and dropped into the timeline, the project was unwieldy and premier and After Effects would be really slow to respond a lot of the time so I only had my previous audio mixing render to work from which remained blank.

This left some guess work to the timing.  And unfortunately, it takes almost as long to build preview renders with in premier pro to at least see if audio and video sync and i was just trying to wrap it up and get it online.

If I had all the time in the world to put into making it there are definitely things I would go back and refine but overall this was a solid 2, maybe 3 days of work comfortably I managed in my free time across 3 weeks.  And now, back to remixing!

Still to come: A commercial campaign I worked on in May will be published shortly as well as a behind the scenes reel so keep an eye out for more updates as there will be a couple of posts about it here as well.  Then, another commercial spot I worked on is out for VFX right now, but once that one is published I'll have a segment on that too.

Several other projects in the works, building a demo reel for a model and actress friend of mine. On a side noteI recently did music and audio post for this little preview:
Yuki Noguchi who I worked with back in January also shot the ACE Rail commercial, did an excellent job on this!  The clients wanted something a little more energetic and building motion to what was happening on picture than the temp music they had.

Lastly, I will be resuming and finishing up the RPM challenge episodes (3 left) for our studio's channel, as well as building a behind the scenes documentary for the Ace Rail commercial mentioned above.  Lots of stuff coming!

Sunday, December 4, 2011

Update this!

If you haven't noticed (or if this is your first time visiting) I've redesigned the layout!  Let me know how you like it.  I do have quite a few things to share however: first being I've just uploaded the entire RPM Challenge Album for everyone to download - FREE!

Borderline Soundtrack (16 songs in 192kbps mp3, album art, and readme.txt) - 128 mb zip file

I've got some new fractals I'm working on to add to the Aural Ascendancy series gallery I have.  Those will be going up soon.  I've also been busy drawing up more of my short skit storyboard and working on building the 2nd episode to the RPM Challenge we did back in February.  If you missed the first one:


The last week has been kind of crazy prepping for a last minute shoot in LA that didn't go through but there's still a project to come of that (supposedly).  Harry wanted my help in putting together a plan of attack for doing a timelapse for a corporate video project or just plain to have for whatever the company wants it for.  I did some research just to make sure I was up-to-date on all the options and narrowed it down to 2 options: 1-2 DSLR's with kit lenses; or a few GoPro Hero HD cameras.  I had very little information on the project to go by other than it's for a 3 week construction project.

He asked me to come up with a solution to tackle the time-lapse, and to get ready to go down to LA with Michael Mok on Thursday (just three days later) stay the night a motel and be up early enough to head out to the campus grounds where they are to start construction Friday morning.  Mok and I would set up the time-lapse system and then proceed to get some interview and B-roll footage; wrap up and head back home that same day.

So, I roughly dove into the world of time-lapses and cameras.  My first solution was to keep a budget in mind (which I had no point of reference whatsoever).  My first thought was to check out GoPro as Mok and I had used them on our previous venture for the Reality Series pilot we were shooting for a previously discussed producer (see A Dashboard Confession).

We all know what a time-lapse is so I'll skip the descriptive analysis.  What it comes down to is that The GoPros offer a very affordable solution that's also easy to setup, but somewhat limited on time-lapse management.  The whole situation calls for us to set it up and leave it, and GoPros only run with an SD card.  I ran into these factors that I immediately emailed GoPro about as I was emailing the pitch to Harry:
  • Can I charge and operate them at the same time?
  • What's the longest amount of time I can leave them unattended?
  • How can I manage the media?
The GoPro support team is amazing! Not only were they quick to respond but they took the time and went the extra mile crunching numbers and giving me some great reference points by telling me exactly how many frames at 5-megapixels I would be able to get on a 32gb SD card, and due to the fact that the cameras shoot at 60 second intervals max, a frame every minute if the camera were to shoot around the clock would last only 1 week.

So here was my pitch to Harry as I was contacting GoPro:

Option 1: 
  •   - Retails $200
  The interesting part is that it's a 5 megapixel camera which is more than double the resolution for HDTV 1080p which gives plenty of room for crop and pan movements to spice up the timelapse.  The downside is I'm not sure what the maximum length of time we'd be able to leave them up to capture until I get a response back from GoPro about several questions I asked them.  This solution however would be an affordable way to get multiple cameras up for multiple angles.

Some accessories to consider:
  •  - Retails $50
  • USB AC Charger
  •  - Retails $20
  As i can't find any documentation and am currently contacting GoPro about seeing whether you can charge and use the camera at the same time; this may be a necessary item for each Camera.  The SD Card price is based on their website though i'm sure we can find cheaper elsewhere.   When i contacted GoPro I submitted a question involving whether or not the cameras can be tethered to a computer for storage and capture which would bypass the need for SD cards, I'll let you know the results as soon as I get a response from them.


Option 2:
  12 megapixel camera, kit includes 18-55mm lens which for covering the viewing angle of the landscape we'd want to cover should be more than good enough, Canon lenses are also good quality optics too though we'd have to play a bit with settings before starting timelapse.  The cameras ARE definitely able to hook up to a computer to control the time interval and store the photos away from the camera.  This however does require quite a bit more setup, programming the camera for the best picture mode I can handle well enough but these cameras are quite a bit larger than the GoPro's and will stand out wherever these are put up on campus.  The advantage of having a camera like this is we can greatly control the capture interval for more effective file management.  If we know exactly how long we want the timelapse to be compressed (3 weeks to 2 minutes for example, we can set the interval accordingly with the accessories).

Some Accessories to consider:
  • Camera Armor
    • Retails anywhere from $15 - $50
    • Absolutely necessary for outdoors and on top of this I'd suggest black trash bags to wrap around and cover the camera and only expose the lens (use lens hoods too).  Covering with trash bags should help hide the cameras but I wouldn't rely on it as a theft deterrent.
  • Battery Grip
    • Retails $50 - $80
  • Extra Batteries for Grip
    • Retails $49.99
  • Lens Filters - UV, and possibly others.
  • 32gb SD card or larger
  • OR laptop or computer source to hook up and control remotely for storage and transfer.

  With the DSLR's we'd have to figure out a mounting option for getting the perspectives we might want, I would expect we'd want more bird's eye views or high vantage points as well as something eye level if necessary.  It really depends on the location.  If you have the address perhaps we can look it up on google maps and get an idea of the space we're working with.

  There's advantages to getting either option.  There are other camera systems like PTZ (Pan-Tilt-Zoom) setups where we can completely remotely control them but are VERY costly ($10,000+ when you consider the broadcast and controller equipment just for a single camera).  I think either of these options should be feasible, just depends on what you want to budget.  The GoPros are the most affordable so we COULD get a decent array going for several points of view to cut to and from.  The downside is if we can only capture onboard the maximum interval length is a picture every minute.  Therefore we have (speculatively) very little control over our time-lapse management.    Option 2 with the DSLR's is quite a bit more expensive which may limit our number of POV shots we can get, but may yield MUCH more control over timelapse management and greater quality image capture due to higher resolution.  Another option that the DSLR's give an advantage over is shooting in Canon RAW (much larger file size) to allow for even more vivid image control in post (better contrast and brightness control in case of severe weather and lighting conditions).  The DSLR's however are still considered entry level and are limited on other formats and features like recording HD video (720p max) compared to other higher end models that can better suit other productions later on.  Image quality-wise the picture would be even greater and higher fidelity than the Sony Z1u you currently use now, but due to the resolution restrictions this wouldn't be an ideal camera for productions so flexibility as a production asset would be minimal and very specific.  The GoPros come with all-weather housing and can even go underwater, which make them extremely versatile and affordable.  These can easily come in handy for productions later on if necessary.  Not to mention the accessories like the Wifi bacpac for remotely viewing and controlling the GoPro cameras (this will be available February next year) will make them even more controllable than they are now.
  Let me know if you need further information on anything or have questions about any of this.  This is just a rough outline.  I could also look up some consumer HD Video cameras as alternatives but usually sensor quality is poor compared to the DSLR's or GoPros and often don't have Timelapse mode support (only 1 or 2 canon and Sony models i can think of actually have specific Timelapse modes featured on their camcorders).
Timelapse Considerations:
Shooting with GoPros would yield a high frame-count which would require cutting out a lot of unnecessary footage (cannot start and stop them).  They also do not (yet) tether.  However, due to their size and even without the waterproof case they are extremely durable and make it very easy to set them up and let them shoot just about anywhere.

With DSLR's it's the opposite:  They are larger, heavier cameras that need good support or some type of fastening system to keep them in place to make sure they don't move.  They have the capability of shooting larger resolutions (you don't have to shoot at the maximum resolution), AND can even give an advantage by shooting in raw.  However, file sizes go up exponentially by shooting in Raw which is another constraint if you're operating off of memory cards.  The other advantage with them is that they can be tethered to a computer to manage file storage and time-lapse management.  This would allow us to be more efficient in controlling when the camera will shoot and what interval to capture frames in so that we get the time-lapse just right without excessive data to have to manage later on.  The issue with tethering is the software running on the computer only manages 1 camera (as far as I've seen).  If you want multiple DSLR setup you're going to need multiple computers to remotely manage them, which also needs to be in a secure location and protected from weather; not to mention having to acquire a computer to attach to the camera is an expense in and of itself.

These cameras are pretty easy to spot, and are also susceptible to cold temperatures or weather conditions so accessories like UV filters, anti-fog or moisture applications to put on said filters, and plastric trash bags to cover the camera and leave only the lens exposed are all good considerations not only for protecting the camera but also to help deter from possible theft or vandalism.

As with both solutions. they can run on AC power and operate simultaneously, but usually when you're doing timelapses its often in places that are a challenge to get AC power to.  The final factor one may have to bring into consideration is a battery backup / generator solution that can maintain the setup in the event there is no AC power available on-location.

What are your thoughts or experiences on shooting timelapses?  What was your solutions for complex scheduling or longer-length projects?  I'd love to hear your comments and feedback!