Showing posts with label 2d. Show all posts

Sunday, April 8, 2012

Too much Film, not enough celluloid

This last week Troy and I have accomplished several large recording sessions for a sound effects catalog project I've been putting together for some time now.  We're still very early in the project, but while I've been working on that I've also managed to finish the 11 video reels to run at this martial arts event in Los Gatos on the 28th that I'll be running a projector and managing all the video and photos for.

Plenty have asked and I have consistently told all that when it comes to video editing Premier really is the easiest to adapt to in terms of a fully featured NLE.  Coming from Sony Vegas, which is a great tool even back in the earlier versions where I spent a lot of my early days editing clips together of video game captures for my friends and I doing Machinima stuff, to moving upward into a package like Premier Pro and After Effects.  After the event is over I'll post again with some depth about working on the project.

This weekend I managed to get the major ground work done designing the Arcade top and the sides.
I sent my client a rough template I had built using the vague description he'd given me.
Keep in mind I'm working the template to this design.  I lined everything up in Illustrator, and the edges can be cut to the shape of the top.

The Logo text is just a placeholder to see if he liked the idea of naming his arcade, and the name could be whatever he wants.

I got my client's feedback and am currently working on updating it to the details he specified.  He decided he wants a much fuller "collage" of characters from all kinds of games to completely cover the top, and to lose the logo idea. 
So now i'm just working on gathering and placing as many characters I can.  I may try to break up the design a bit more with some tech shapes that fill in the middle and give some more lines to work with character orientation and placement now that the logo is gone.

Resuming my old short skit storyboard too.  I'm hoping to have this done by the end of April as I'm just working on it here and there in my free time.  The intended running time for the short should be somewhere around 2-3 minutes.

Setting up a storyboard plot in Photoshop from scratch was fairly easy though getting to the organization took a bit of work:
 Each of those master folders has a folder for each cell or frame.
Each frame folder allows me to contain my elements separately so when I go cropping each frame out individually I can just delete the other frames from the PSD file, and import all the relevant elements into After Effects to build quick pre-viz animations with, and allow me to choose what I want to show in terms of aspect ratio, shot details (orange) , and camera movement (blue), or actor movement (green).

Let's see if anyone can guess what's going on just by looking at the frames below:

I'm hoping to get some friends to help put this together soon.  The paid projects come first so I'm working to get them finished so I can make time for these.  I'll try to keep regular updates coming. though I may start splitting the updates into individual project blogs.  As always, feel free to leave comments, criticism, feedback, tech support, links, hot links, polish sausage and just about anything else you can imagine... gosh, I'm hungry.

Friday, January 14, 2011

Fractal Gallery 4: Aural Ascendancy Series


I started this series but never got to finish it.  I have a bunch of fractals I designed that just never got around to rendering, so they may come out slowly this year.  Nonetheless I shall post up what was started in this series.  As the name might suggest for this series, I wanted to go for something more audio inspired.  A lot of these works to me felt like they captured the essence of audio or sound or a particular function that happens in the physical world.  For example, take "RT60" based on a particular method that I used to analyze an impulse response from a sample library I have and brought it in to Apophysis as a particular sample cloud to create the fractal.  Here's the collection so far, and feel free to check my deviantart page for the full views.

Red

Pulse

RT60

On another note,  I just got a nice private tour of a nice studio in Modesto with Troy accompanying Mok and myself.  We mingled and talked about projects.  Lots of awesome people to network with there.  Troy and I are cooking up something pretty cool if I don't say so myself in fact.  I showed him and a few friends this RPM Challenge coming up in February and have gotten a few people onboard with the idea.  I may start posting up some information on it as it gets closer.  

Right now I'm just working full force on this story concept of mine, and networking / job hunting.    Even have an audition on Saturday for a lead guitarist spot in some band... Lots and lots of opportunities I'm working on!
Stay tuned for more developments

Monday, January 10, 2011

Fractal Gallery 3: Anarchy Series

Anarchy Reigns

Frozen

Red Dwarf

Shards of Reality 2

Circle of Life

The Nexus

The Phoenix

Landfall

More on the way...

Wednesday, December 29, 2010

Fractal Gallery 2: Degeneration Series

After my first set of fractals went up, working full time at a local retailer was pretty much my only livelihood at the time so I spent a lot of time away from my computer, which allowed me lots of rendering hours to complete some more interesting ones I'd come home and fiddle with.  Degeneration series was born out of some rather unusual concepts just playing around with the fractal designs that I would "degenerate" from basic fractal patterns.

I'll forgo my commentary and just state up here that only a select few have any slight adjustments in photoshop, everything else is straight out of Apophysis 2.02. through 2.06.  For wallpaper sizes, please see the entire collection in full view at my deviantart


Motion Purge

Apeface

Escape

Escape 2

Helix

Butterfly

Dreamcatcher

Pulsar 2.0

Quantum Fold

Spiral Addiction 1.0

Spiral Addiction 2.0

Thursday, September 30, 2010

What's the Story - Continued

Just last night, me and another editor started and finished reviewing our footage from this next scene.  We took notes and built a time log of cut ins and outs for each take in the footage, which camera angle, etc...  for the editing process later on.

Our first shoot consisted of two scenes shot in the same day.  We had a lot of source material to work with and conditions for shooting weren't ideal.  Again, with little to no rehearsal time, it took us the longest time to get through this scene.  So here are the storyboards from Scene 8 of "Red Hawk Rising".


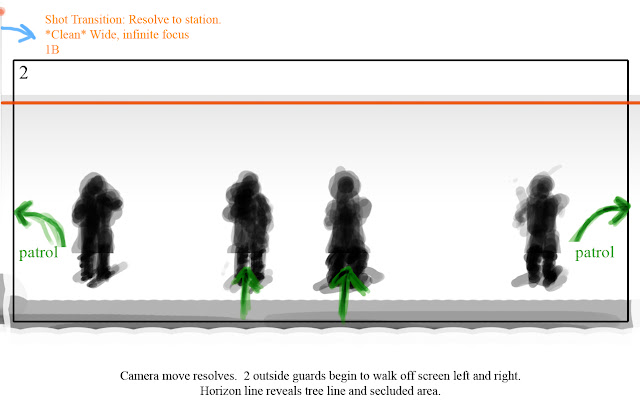
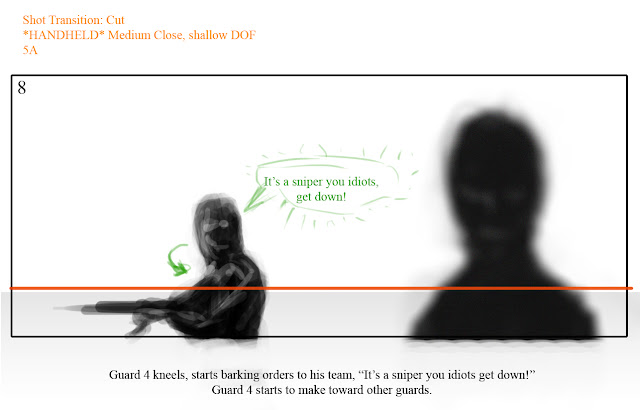
The first thing we wanted to establish in shooting was finding all our camera angles for the scene.  From here we continued with the wide shots to transition from the scene before it into this.  Now, before you say "Hey, I found a flaw!" We already realized this and yes, we didn't catch it during the shoot.  Our main actor had switched shirts after all of our wide shots and going forward in all of our close-ups he's wearing just a black tank-top.  This is one of the easiest mistakes to overlook and the easiest to catch if you're paying attention.  So right away, all of our wide shots are useless if we wanted to actually build the film.  However, we only need small segments from the scene to build the trailer with so I believe we're okay still!
Being a dialog-heavy scene, it was critical to find the right timings and when to switch to what camera.  However, we only had one camera and with little to no rehearsal, each take was very rough and completely different,  so during our review we spent more time pinpointing audio and video segments from each character's standpoint and the overall performance to hone in on what worked and what didn't.  During editing this will make it a lot easier to rely on notes with specific time-code markers to build continuity in the scene.
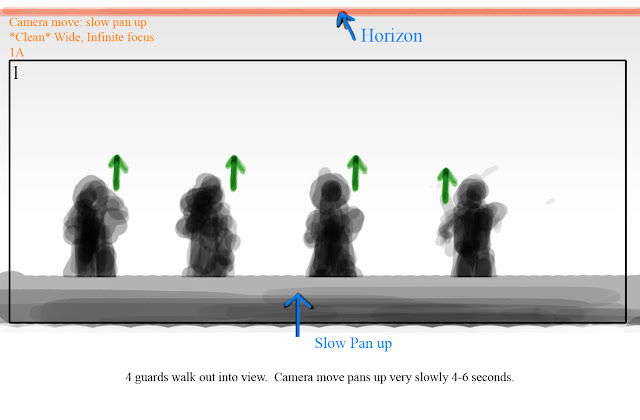
With story-boarding on this scene, conveying the scene of serious dialog has to do with the characters and positions so i looked through the footage roughly for certain frames that I feel best conveyed the bulk of that camera angle's take.  These were also my reference point for building the action I discussed in the previous blog entry.
Because of the colors from the stills I extracted it made it very easy to do some basic adjustment layers after running the action script and creating a separate action for that,  then combining the two once I was satisfied with the results for multiple stills.
We were actually doing dress rehearsal as part of our shooting so we had a lot of redundant footage with terrible audio just as practice.  Once we got the mic and boom in place, the first issue was our location.  We were facing the direction the wind was blowing, and we were right next to the shoreline on the pier we were at.  That's the Golden Gate in the background you can see in several shots.  So, wind and shoreline noise made it rough to get good audio. 
 
Typically productions will hold the mic above and out of frame to get the audio, but it was to our advantage based on our posture and the elements in the environment that using a cardioid pencil condenser mic, covered with a couple socks (regular socks!) on a boom just on the outside of the railing below the frame aiming up at us in the frame worked out perfectly!
 
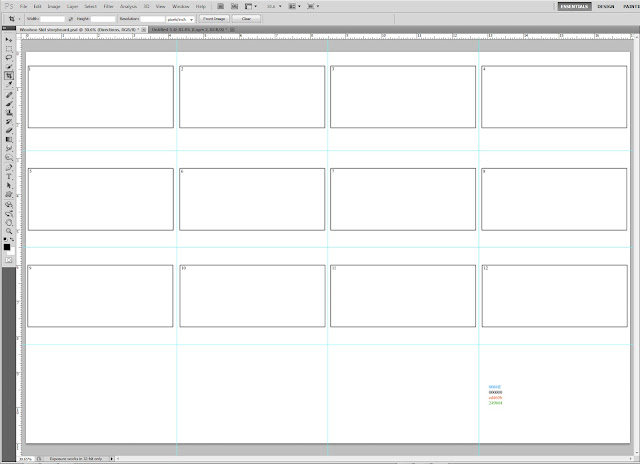
The sequence I've posted in is still only in a rough order.  The actual storyboard will take place during our next meeting with the crew as we head into editing.

With the story-boarding for this scene, with so many camera angles to work from, I want to try and establish a good perspective for cutting around dialog.  So having as many angles as possible to cut through and displaying them in storyboard will allow us during editing to fine tune the story, and how many or few cuts to do.  Or, at the very least, give us a good guide to work from and improve on in the future if we re-shoot.
Let me take a moment to describe our work-flow.  It's a bit backwards compared to how a professional indie project might go (or any professional production for that matter), but for what we're doing it's a start.
When we started out, we: small group of friends wanting to do some type of project - started out doing little skits and filming them, which quickly turned into "lets do something bigger".  I started developing a quick story outline, which then turned into a complete rough treatment.  With some minor tweaks to the treatment which conveys the ENTIRE story for the short film's plot, we decided to move onto to shooting basic scenes to build a trailer with. 
Our first scheduled day to shoot was pushed back as no one was available to go, so I took some time to manage the project and pushed out another month, which then allowed me to refine the treatment a bit more, while still keeping it loose enough to leave room for any major changes that might arise from production problems.  Come the last week before the shoot, I roughed out the dialog for scenes 5 and 8 to be shot that Saturday.  I proceeded to send and make copies of script and treatment outlines for everyone to take and practice with during the trip out to San Francisco.
The idea to shoot for the trailer quickly became shooting the entire scenes as if we were building the short film.  The reasoning behind this is that we get the time and experience to play and experiment with the story directionality, visual styles, and establish source material to build storyboards and refine the treatment further so that if the trailer picks up enough attention for potential investors to do the actual indie film justice, we'll be well prepared and documented!
I'm already scouting locations for the next major scene elements we plan on shooting, out of 9 scenes, 2 have been shot, the other 7 are in development for staging and location scouting; 2 of which are completely ready for production (no dialog in sequences).  Once we have staging diagrams and locations I'll be scheduling the next shoot :)