It's been a little while since I've given my blog some attention. Lately, I've been in the middle of a huge boost in all sorts of things. Positive attitude will take you very far when you have the means and direction to do so! I thought I'd take a moment to stop, think, and reflect on all that's been going on and all that i've been building up to come in the near (and distant) future. Most of this being business related of course.
I've really shifted gears this past month and started to take command of my career from a different angle. A much fresher approach that would be far more likely to survive and lead to success in this age than traditional modes of business might fair.
Let met first start off by just recounting what's been keeping me so busy. Realizing that teetering on the edge of debt and "joblessness" isn't as black and white as it sounds, I've been for lack of better terms "unemployed" for a while now. This time has given me much room for creative re-envisioning myself as well as my "business". I've believed for a long time now that what I do is not easy, and that as I deal more and more with others who are either new to the industry or trying to find their own niche that it's not so much about "raw talent", "incredible skill" or any craft or creative notion that creates a stigmatic view on the multimedia and entertainment industries... It's knowledge and education.
I've grown almost hyper-aware of the fact that as we cruise ever faster into this era, reality has taught us some hard lessons (whether you're aware of them or not). One being customer centricity. It's a word, really. There's a serious stigma in the world of music production and that is the vagueness and misconceptions that float around because of the sheer multitude of things that go on within it.
I've talked about the industry view before, mentioning the huge change in the landscape away from the big recording studio models that have now all but completely disappeared in the face of the home/project studios. Technoloy has made it so affordable and accessible to people that it's simply more economical to go this route than to shell out massive amounts of cash to doing a full scale recording studio production with top-end gear and get that legacy sound that's so "sought after". It's also put a lot of the power directly in the hands of those who many not understand or grasp the fundamentals these technologies are based on.
Today, the stigma is about identity. Who does what, what things do, how things work (with regards to the music industry). I had an up-and-coming rap artist approach me who's excited to make his passion a sustainable career. Admittedly, the problem is he knows nothing about the music industry.
So here's where I reveal what I've been "re-envisioning", I'm no longer just approaching my business as a tool and service for creating a product; I must play the role an educator. I want my clients to be able to walk away from a project / session / consultation enriched with new knowledge; knowledge I am happy and eager to share with them. I'm finding this approach to my business already immediately more rewarding to everyone than just simply treating them like my best bud who happens to be interested in a service being rendered.
Today, I met someone who used to run their own studio and actually composed some music for E-40. A ghost-writer if you will. Not lyrically of course, but compositional. He admitted that a lot of people don't understand what a ghost writer is. He seemed pretty amazed that I even knew what he was talking about, as I was discussing with him that I run my own studio as well. I, however, was surprised when he asked me about how I approach my artists. He was more interested in knowing just what I do for my clients beyond JUST being a facility someone can come to record.
This is very smart for two reasons, one being that clearly he knows the difference between someone calling themselves a studio with minimal gear and minimal knowledge versus someone who may have a small setup but knows how to get quality recordings (of which the latter are few and far in between).
Second, it's not just the quality that's in question, but it really comes down to the "bang for your buck" factor. We all expect our dollar to work for us more; whether it's longer warranties, better customer service from the company that provided us the product; as a studio engineer I'm more involved with my clients than one would expect especially when I'm "contract-based".
Here's a scenario. I charge $100 for a 4 hour session for simple vocal recording. My clients come in, they have provided a mixed track ready to for them to perform to. What I do is not only act as an operator for all the gear making sure things are set and working correctly and being able to press record stop and playback for them... I offer my critique and opinion. It's established that i'm only human and my personal tastes will obviously affect my judgement of their performance. The bigger picture here is that they understand that my critique is meant to be constructive as i only care about helping them achieve the best possible end result just as surely as they do. I'm not offended if they don't take my advice, and likewise would be happy to "be schooled" when I'm dealing with a musical genre subject they might know way better than me. In other words, I'm as open to being educated, as I am about educating them.
In some circles or schools of thought, everything should come with a price tag. An engineer should just manage the session, if the client can afford a producer, the producer is the one with the opinions, and marketing should be left to the labels. You can see why this doesn't work if you simply look around the internet, especially with indie labels and kickstarter projects everywhere. A budding artist will dream of being signed by a label, a signed artist will dream of independence and creative freedom.
We have to get smarter about our dreams, passions, and goals. Education and knowledge are the best tools to achieving any of those.
I'm in the middle of a huge push to get all the underpinnings of this business solidified and established. I've started pre-production on a new instructional video series I plan to launch in the near future on my youtube channel. I'm reaching out to several companies right now as well (including Gobbler, Rode Mics, and more) and connecting with some HUGE communities who are all thirsty for knowledge I can share with them (including Film Riot, IndyMogul, etc..).
To give you an idea of the range of topics I'm covering, here's a list of the open scripts I have in development right now.
1. Studio essentials monitor setup and critical listening
2. QUICKTIPS Audio Fundamentals 1 - Frequency versus wavelength
3. QUICKTIPS Audio Fundamentals 2 - Domains
4. Tips for online collaborative workflows
5. Recording Audio for Video - Low-no budget Mic solutions
6. QUICKTIPS Audio for Video - Bass Management
So here's where you come in. In the comments section below, please tell me what you would be interested in learning about, share your passions, and even feel free to share your experiences to answer another person's question if you wish. Then, share this article with your friends and find out what they're interested in learning!
Showing posts with label audio engineer. Show all posts
Showing posts with label audio engineer. Show all posts
Friday, September 14, 2012

Friday, August 31, 2012
What Does A Ninja Sound Like?
Welcome back to part two. It's been getting a bit hectic trying to wrap up several projects and get a ton of new stuff rolling but I'm going to get a little more technical and in-depth on this article because I wanted to share some more in-depth information.
I should note that my production workflow has been extremely loose from project to project in terms of sync and audio capture. I don't normally bring in my audio and try to sync inside of my NLE. Instead, what I do is just leave the in-camera audio on the NLE's primary audio track and label it Scratch. During picture lock, which is the stage in which I can safely say I will no longer be making any time-based changes to my arrangement of clips or their lengths I begin exporting the project to work in my DAW. Typically this is done via OMF export options.
One thing I always do as I start editing and importing audio into Sonar is it's crucial to find the spots where transitions or cuts happen in the video. As I work to the picture and import my sounds and start placing them on the timeline I find the cuts in the video and place markers on my timeline for easier recall.
 This
has helped saved time especially as a workaround for Sonar's lack of
real-time video scrubbing (at least for me). It seems that for some reason no matter
which file format I work in or resolution (HD / SD) I still have
buffering issues with Sonar: The further away from the beginning of the timeline I get the longer it takes to respond to user input. In this regard I think my next video
projects I'll try Avid Pro Tools seeing as how they've had a
long-standing history with working to picture as it's been the industry
standard for such a long time. I just haven't had the chance to do this yet, as Sonar is my most comfortable DAW and one I instinctively gravitate to.
This
has helped saved time especially as a workaround for Sonar's lack of
real-time video scrubbing (at least for me). It seems that for some reason no matter
which file format I work in or resolution (HD / SD) I still have
buffering issues with Sonar: The further away from the beginning of the timeline I get the longer it takes to respond to user input. In this regard I think my next video
projects I'll try Avid Pro Tools seeing as how they've had a
long-standing history with working to picture as it's been the industry
standard for such a long time. I just haven't had the chance to do this yet, as Sonar is my most comfortable DAW and one I instinctively gravitate to.
A huge workflow tip: as I edit and mix is using the clip features in Sonar such as creating clip groups to keep multiple audio tracks in sync with each other.
 This
practice helps keep me moving through spots quicker. Even in the
picture above there are 2 clips overlapping in each of the audio tracks. I
grouped each one separate so I can still edit the timings between the
clips if I need to. You can also group large quantities of clips spanning various tracks together (great after building a "sound" up from various elements and not quite ready to create a bounced stem). Once these clips are grouped things like slicing and fades and trimming apply uniformly to the entire group.
This
practice helps keep me moving through spots quicker. Even in the
picture above there are 2 clips overlapping in each of the audio tracks. I
grouped each one separate so I can still edit the timings between the
clips if I need to. You can also group large quantities of clips spanning various tracks together (great after building a "sound" up from various elements and not quite ready to create a bounced stem). Once these clips are grouped things like slicing and fades and trimming apply uniformly to the entire group.
Once I've got the audio where I want it and things match up to picture well, I make avid and religious use of the clip lock features in Sonar. I clip locked both the data and the position to show this case:
 Sonar
allows independent locking of both Position and actual clip data. I
normally just clip lock position and then can come back to it later for
doing things like clip automation (gain, fades, etc.) but in this case I
don't need to do any of that so I went ahead and locked both position
and data. The biggest benefits for independently locking these two ways of manipulating clips is to accommodate the different workflows:
Sonar
allows independent locking of both Position and actual clip data. I
normally just clip lock position and then can come back to it later for
doing things like clip automation (gain, fades, etc.) but in this case I
don't need to do any of that so I went ahead and locked both position
and data. The biggest benefits for independently locking these two ways of manipulating clips is to accommodate the different workflows:
Example:
This provides a huge advantage of saving yourself from trouble later on in the event of mishaps like the program locking up or hanging for a moment while you're making selections / deleting / moving things around. The most common mistake is ending up way ahead in your project before you notice something is missing or has changed due to one of those overlooked circumstances.
It's Wednesday, May 9th (just over a week after the original shoot) and I've managed to rough in all the audio for the first spot - the 60 second Ninja version. I first set out to capture the worldization of the music track to blend in with the actual song and give the music some room to sit in the visuals and then pop out when it's supposed to.
It's worth noting the time frame in which I'm working. We did all of our pick-up shots this same day I'm already beginning audio work on picture-locked versions of the commercial.
Projects like this usually have a 2-3 day turnaround time if not less. In fact, in a future blog article I will discuss time-frames on my other commercial project Zenergy Band. Long story short, a full day of shooting with a rough cut turnaround to the client in just 6 hours after the production wrapped. But for now, back to what Worldization is.
 Worldization is a clever yet simple technique (in concept) of playing back a sound or sample into a given environment, and recording the new sound as it's interacting with that environment.
The commercial spot has several different ranges between each of the 3 ninjas and the main actors sitting in the back room. The music track ended up being a last minute selection to fit the deadline and still fit the mood of the commercial. Since I can't be on location I set up 3 mics in my house and just used my JBL's to play back the solo'd music track, with the microphones' 'input echo' off (so they don't feedback into the recording).


The first mic I put up was in the middle of the hallway. I opened the hallway closet up to help with some dampening so it didn't sound completely like a hall.
 The
2nd mic is the Audio Technica in the far end of the room adjacent to
where I'll be playing the music from. The Rode NTG-3 is placed closest
to the room but facing as off-axis as I can get it, and aimed directly at
the wall just feet in front of it almost perpendicular to the
direction of the sound source. This should help enhance low-end
reflecting off of boundary surfaces as large as the wall it's aiming at which is also in front of a small cove for the entry way that naturally
enhances low frequency content.
The
2nd mic is the Audio Technica in the far end of the room adjacent to
where I'll be playing the music from. The Rode NTG-3 is placed closest
to the room but facing as off-axis as I can get it, and aimed directly at
the wall just feet in front of it almost perpendicular to the
direction of the sound source. This should help enhance low-end
reflecting off of boundary surfaces as large as the wall it's aiming at which is also in front of a small cove for the entry way that naturally
enhances low frequency content.
So looking at the screenshot above again The green automation lines represent the volume changes throughout the tracks to simulate room changes when the camera cuts between locations.
The next step was to record Foley for the sword whirling and clothes cutting. I called Troy up to come over and help out as running Foley sessions is a 2 person job at best. The first thing we discussed was tackling the sword whirling sound and we went through several items and settled on a broken power extension cable.
 There's a particular setup I'm using with 3 mics. I chose this method to give me the greatest range of options for panning and color as each mic is distinctly different. An Audio Technica 3035 (cardioid condensor), Rode NTG-3, and an AKG C414 in Omni placed high up to get more ambiance.
The microphones' various recordings came out perfect and I ended up with an LCR approach to the mixing for stereo. I imagine if I ever had to upfold this project or completely re-mix it for a 5.1 surround track I would have more than ample material to place in the 5.1 mix and still maintain a good balance and presence.
The editing workflow I use is pretty solid to me a this point as I've done several projects that have steadily grown in audio demands and complexity or have allowed me the freedom to experiment (which is a great opportunity to have)!
While getting to see the project and all the edits I did. It's much more helpful just to describe my workflow and the order I like to do things in.
After capturing the audio the first thing I did was move the audio tracks far down the timeline away from any of the actual commercial material although ideally I would have just created a separate project for the recording session and what I'm about to describe next.
The first actual bit of work I set out on these audio clips is to clean them up, which involves denoising and any sort of effects for processing to get rid of unwanted background noise. Once these are applied (which I normally do to each clip individually, and not the track), I then bounce the clips to commit the processes to audio. Then, I begin slicing up all the useful bits and deleting useless audio gaps.
 Sonar has a cool little process that can be applied to clips on the timeline that remove silence. However this tool still requires some finessing and the volume levels of our Foley session vary so greatly it was easier and quicker just to manually slice the bits I needed. After all the cutting, fades were applied, then came the arrangement of those clips which you can see their final place in the image above.
It's now Thursday, May 10th and I've just gotten to the point where I can transfer all the audio work I've done from the 60 second ninja spot. I now have to build the audio for the 30 second spot.
I felt like exporting all my tracks out of Sonar individually to try my hand at working to picture in Pro Tools later. Sonar has some really cool ways to easily bounce tracks and commit to audio all the Effects and even track and bus automation. Note, this is not my workflow process I used since I actually stayed inside of Sonar for the entirety of the project. I just want to highlight a really useful feature for quickly getting a project like this out of this daw and quickly into another daw like Pro Tools.
 I highlighted all the tracks I want to export individually, and go to File > Export.
This is where I need to pay attention to my output options. Sonar can output the tracks I want but I don't want it
 With
Tracks selected under Source Category, I un-check the box for "Track
Automation" and since this is bouncing out the tracks individually
before they hit the buses I don't have to worry about bus automation.
With
Tracks selected under Source Category, I un-check the box for "Track
Automation" and since this is bouncing out the tracks individually
before they hit the buses I don't have to worry about bus automation.

I normally un-check Fast Bounce just as personal preference but it really doesn't matter as any quality difference between Fast bounce and normal bounce is completely inaudible in most cases.

The next thing to follow immediately when I click save is a dialog box:
Sonar will not let you hit save unless you type something in the file name area.
I chose to simply put B and hit enter and this dialog box appears to confirm the following Actions Sonar is about to perform.
It clearly shows each individual file that's going to be created in the place I chose to save them, and that they all have a prefix "B" and Sonar automatically formats the file name with B-*track name*.wav
A really handy feature to have, as well as time-saving.
Sonar renders out the audio in one pass so it can take a while to process and write all the individual files at once.
I saved out OMF files for each of the individual spots and opted to simply rebuild audio for each of the 4 commercials individually. I have greater control inside of Sonar and don't have to deal with the limited interchange options for audio from inside of Premiere Pro this way and thus I can move much faster.
The OMF for the 30 second ninja spot gets saved out the new project file. Import the video track and set up the buses. Here's the new template:
 More cool tips! Sonar has lots of hotkey commands that help save
time. When opening an OMF the audio tracks are placed on the timeline
with the clips properly but the default selection is their outputs just
go to your audio hardware's first output, and there are no buses. So the
first thing I do is create a master bus.
More cool tips! Sonar has lots of hotkey commands that help save
time. When opening an OMF the audio tracks are placed on the timeline
with the clips properly but the default selection is their outputs just
go to your audio hardware's first output, and there are no buses. So the
first thing I do is create a master bus.

Right clicking on the bus and you'll be able to see the option to "set as default bus". A cool time-saver for future tracks that get created will now immediately route to the master bus as their output.
Next I simply create the remaining buses I know i'm going to use for the mix later on and these will all automatically route to "master":
 Now
comes the interesting part. As I import the audio tracks I tackle
track management and start creating folders and sending the tracks to
the proper buses.
Now
comes the interesting part. As I import the audio tracks I tackle
track management and start creating folders and sending the tracks to
the proper buses.
 Here's
another cool little time saver. I can just select the tracks I want to
put into a folder, once I have them all selected I just simply right
click and there's an option to "move to folder".
Here's
another cool little time saver. I can just select the tracks I want to
put into a folder, once I have them all selected I just simply right
click and there's an option to "move to folder".
 This
can work in various ways but since Sonar only has 1 folder level to
work with, if audio tracks already reside in folders the option will not
be there, instead "move to folder" will be replaced with "remove from
folder" and then you have the option to place the tracks into existing
folders / new folder.
This
can work in various ways but since Sonar only has 1 folder level to
work with, if audio tracks already reside in folders the option will not
be there, instead "move to folder" will be replaced with "remove from
folder" and then you have the option to place the tracks into existing
folders / new folder.
Since I imported the tracks all at once, they are all routed to the master bus. I simply just open up the folder track and select all the tracks within.
 Shift+click at the bottom track in the SFX folder to select all of
them, which brings up the last track selected in the channel preview
on the left side. The default bus is still Master so hold down CTRL
and select "SFX" as the new bus. this applies the new bus selection to
all the selected tracks.
Shift+click at the bottom track in the SFX folder to select all of
them, which brings up the last track selected in the channel preview
on the left side. The default bus is still Master so hold down CTRL
and select "SFX" as the new bus. this applies the new bus selection to
all the selected tracks.

Next, I have all the audio tracks and clips selected in the timeline I want to trim all the silence away and leave me just the audio material clips to move around and re-fit for the 30 second version.
 The dialog box appears for the Remove Silence tool.
 I set
the open and close level to -68 dB. The settings above seem to produce
good cuts without any sudden pops or clicks as the waveform leaves 0
degrees. The look ahead also gives ample time for changes using the 2
millisecond buffer in the attack and release times. It's worth noting that I'm choosing to use this tool here instead of earlier doing the original cuts to the foley session as on these rendered out tracks there is "true" silence. There should be no clutter and I should be left with only the audio clips I want and already edited.
I set
the open and close level to -68 dB. The settings above seem to produce
good cuts without any sudden pops or clicks as the waveform leaves 0
degrees. The look ahead also gives ample time for changes using the 2
millisecond buffer in the attack and release times. It's worth noting that I'm choosing to use this tool here instead of earlier doing the original cuts to the foley session as on these rendered out tracks there is "true" silence. There should be no clutter and I should be left with only the audio clips I want and already edited.
I saved the settings as a preset (because Sonar doesn't come with any default ones). Run the tool. and below is the result from the trimming.
 Now
to focus on placement for the 30 second version and figuring out how to
tackle the music track for the shorter play time. It's back to the
routine set up, placing markers along the timeline to mark the shot
changes in the video. Moving and trimming the clips to fit the shorter
shots, and then re-mixing the music with automation.
Now
to focus on placement for the 30 second version and figuring out how to
tackle the music track for the shorter play time. It's back to the
routine set up, placing markers along the timeline to mark the shot
changes in the video. Moving and trimming the clips to fit the shorter
shots, and then re-mixing the music with automation.
Between the 60 second and 30 second versions of the Ninja project, I have all the audio material I need to use these two project files as templates for building the biker's 60 second and 30 second spots. I simply saved out each project file (copying audio to a new folder) and named it accordingly. This choice in project management allows me to keep additions to sound clips added in for the biker content like the bikes pulling up in their respective project folders and not cluttering up the whole project.
 As I wrapped up the first two (one sixty second Ninja and Biker version) I uploaded them privately on youtube for the client to review. The okay was given and they asked for a 2nd variation at the end where the tag-line was different. This was a simple edit, in Premier Pro I simply swapped out the last clip with the correct one for the new tag-line, keeping the same length. In the audio projects I simply saved the project and labelled it "alternate" to identify each of the 4 commercial projects with the new tag-line, dropped in the voice track and synced it up and processed it.
Mixing was a bit more of a duty to attempt uniformity across all the projects but still simple none-the-less. Since I didn't have any of my plugins or processing done until after all the project files had been duplicated from each other, I simply went in to each track and bus and saved out FX Chains and Presets from the plugins, and simply followed the load-out on each of the projects.
Now, with audio mixed and mastered, I headed back into my premier pro project file and loaded up the appropriate audio files to replace the audio of each sequence. Finally, text was added and final grading was done, and the results are now posted on youtube... The time difference between when I finished a bulk of this work and actually closed out the project was due to a client hiatus. Sometimes things happen and when projects reach their milestone like this and the client is unable to give any feedback or communicate they are ready for another step forward in the project is when ultimately I am stuck sitting on my hands waiting to be told what to do.
Some insight: [] We shot this on a shoe-string budget, with a small schedule expecting a short turn-around. I had all 4 commercials ready for the client to approve and deliver within the first 2 weeks but because of unforseen circumstances on the clients side, communication breakdowns occured and my producer and I were left waiting for approvals on things for almost 3 months. However, most of the work was paid for (aside from some of the editing).
IF jobs like these pop up, always make sure to cover yourself legally, or at the very least as a work ethic demand payment up front in full. If for some reason political aspects begin to play into the business end of things like getting paid for your work, you need persistence and follow-through to make sure you get paid. I've learned this the hard way through the years of growing my business from the ground up.
I'm not saying this out of personal aggravation (though there was a little of that). I understand this happens and the catch here is learning not to take things like this personally, it's just business, and in the end whether you get paid or not you have only your sanity. Roll with the punches, don't get angry when they hit you. Keep on trucking, and do what needs to be done.
I should note that my production workflow has been extremely loose from project to project in terms of sync and audio capture. I don't normally bring in my audio and try to sync inside of my NLE. Instead, what I do is just leave the in-camera audio on the NLE's primary audio track and label it Scratch. During picture lock, which is the stage in which I can safely say I will no longer be making any time-based changes to my arrangement of clips or their lengths I begin exporting the project to work in my DAW. Typically this is done via OMF export options.
One thing I always do as I start editing and importing audio into Sonar is it's crucial to find the spots where transitions or cuts happen in the video. As I work to the picture and import my sounds and start placing them on the timeline I find the cuts in the video and place markers on my timeline for easier recall.

A huge workflow tip: as I edit and mix is using the clip features in Sonar such as creating clip groups to keep multiple audio tracks in sync with each other.

Once I've got the audio where I want it and things match up to picture well, I make avid and religious use of the clip lock features in Sonar. I clip locked both the data and the position to show this case:

Example:
building a sound design element it's usually more crucial to have the sound in sync before working on the actual sculpting of the sound, therefore locking position can assure you that while you affect the clips with plugins, fades, and even trimming (not affected by position lock), the clips are not accidentally moved.Example 2:
Clips that require movement but want their particular trims, fades, and other clip-based edits to remain intact while you move them along the timeline, the data lock ensures these do not get altered.
This provides a huge advantage of saving yourself from trouble later on in the event of mishaps like the program locking up or hanging for a moment while you're making selections / deleting / moving things around. The most common mistake is ending up way ahead in your project before you notice something is missing or has changed due to one of those overlooked circumstances.
It's Wednesday, May 9th (just over a week after the original shoot) and I've managed to rough in all the audio for the first spot - the 60 second Ninja version. I first set out to capture the worldization of the music track to blend in with the actual song and give the music some room to sit in the visuals and then pop out when it's supposed to.
It's worth noting the time frame in which I'm working. We did all of our pick-up shots this same day I'm already beginning audio work on picture-locked versions of the commercial.
Projects like this usually have a 2-3 day turnaround time if not less. In fact, in a future blog article I will discuss time-frames on my other commercial project Zenergy Band. Long story short, a full day of shooting with a rough cut turnaround to the client in just 6 hours after the production wrapped. But for now, back to what Worldization is.

The commercial spot has several different ranges between each of the 3 ninjas and the main actors sitting in the back room. The music track ended up being a last minute selection to fit the deadline and still fit the mood of the commercial. Since I can't be on location I set up 3 mics in my house and just used my JBL's to play back the solo'd music track, with the microphones' 'input echo' off (so they don't feedback into the recording).


The first mic I put up was in the middle of the hallway. I opened the hallway closet up to help with some dampening so it didn't sound completely like a hall.

So looking at the screenshot above again The green automation lines represent the volume changes throughout the tracks to simulate room changes when the camera cuts between locations.
|
| here it is again if you don't wish to scroll.... |
The next step was to record Foley for the sword whirling and clothes cutting. I called Troy up to come over and help out as running Foley sessions is a 2 person job at best. The first thing we discussed was tackling the sword whirling sound and we went through several items and settled on a broken power extension cable.

 |
| Moving positions for the "ripping" foley. |
The editing workflow I use is pretty solid to me a this point as I've done several projects that have steadily grown in audio demands and complexity or have allowed me the freedom to experiment (which is a great opportunity to have)!
While getting to see the project and all the edits I did. It's much more helpful just to describe my workflow and the order I like to do things in.
After capturing the audio the first thing I did was move the audio tracks far down the timeline away from any of the actual commercial material although ideally I would have just created a separate project for the recording session and what I'm about to describe next.
The first actual bit of work I set out on these audio clips is to clean them up, which involves denoising and any sort of effects for processing to get rid of unwanted background noise. Once these are applied (which I normally do to each clip individually, and not the track), I then bounce the clips to commit the processes to audio. Then, I begin slicing up all the useful bits and deleting useless audio gaps.

It's now Thursday, May 10th and I've just gotten to the point where I can transfer all the audio work I've done from the 60 second ninja spot. I now have to build the audio for the 30 second spot.
I felt like exporting all my tracks out of Sonar individually to try my hand at working to picture in Pro Tools later. Sonar has some really cool ways to easily bounce tracks and commit to audio all the Effects and even track and bus automation. Note, this is not my workflow process I used since I actually stayed inside of Sonar for the entirety of the project. I just want to highlight a really useful feature for quickly getting a project like this out of this daw and quickly into another daw like Pro Tools.

This is where I need to pay attention to my output options. Sonar can output the tracks I want but I don't want it


I normally un-check Fast Bounce just as personal preference but it really doesn't matter as any quality difference between Fast bounce and normal bounce is completely inaudible in most cases.

The next thing to follow immediately when I click save is a dialog box:
Sonar will not let you hit save unless you type something in the file name area.
I chose to simply put B and hit enter and this dialog box appears to confirm the following Actions Sonar is about to perform.
It clearly shows each individual file that's going to be created in the place I chose to save them, and that they all have a prefix "B" and Sonar automatically formats the file name with B-*track name*.wav
A really handy feature to have, as well as time-saving.
Sonar renders out the audio in one pass so it can take a while to process and write all the individual files at once.
I saved out OMF files for each of the individual spots and opted to simply rebuild audio for each of the 4 commercials individually. I have greater control inside of Sonar and don't have to deal with the limited interchange options for audio from inside of Premiere Pro this way and thus I can move much faster.
The OMF for the 30 second ninja spot gets saved out the new project file. Import the video track and set up the buses. Here's the new template:


Right clicking on the bus and you'll be able to see the option to "set as default bus". A cool time-saver for future tracks that get created will now immediately route to the master bus as their output.
Next I simply create the remaining buses I know i'm going to use for the mix later on and these will all automatically route to "master":
- Voice
- SFX
- Music


Since I imported the tracks all at once, they are all routed to the master bus. I simply just open up the folder track and select all the tracks within.

Next, I have all the audio tracks and clips selected in the timeline I want to trim all the silence away and leave me just the audio material clips to move around and re-fit for the 30 second version.

I saved the settings as a preset (because Sonar doesn't come with any default ones). Run the tool. and below is the result from the trimming.

Between the 60 second and 30 second versions of the Ninja project, I have all the audio material I need to use these two project files as templates for building the biker's 60 second and 30 second spots. I simply saved out each project file (copying audio to a new folder) and named it accordingly. This choice in project management allows me to keep additions to sound clips added in for the biker content like the bikes pulling up in their respective project folders and not cluttering up the whole project.

Mixing was a bit more of a duty to attempt uniformity across all the projects but still simple none-the-less. Since I didn't have any of my plugins or processing done until after all the project files had been duplicated from each other, I simply went in to each track and bus and saved out FX Chains and Presets from the plugins, and simply followed the load-out on each of the projects.
Now, with audio mixed and mastered, I headed back into my premier pro project file and loaded up the appropriate audio files to replace the audio of each sequence. Finally, text was added and final grading was done, and the results are now posted on youtube... The time difference between when I finished a bulk of this work and actually closed out the project was due to a client hiatus. Sometimes things happen and when projects reach their milestone like this and the client is unable to give any feedback or communicate they are ready for another step forward in the project is when ultimately I am stuck sitting on my hands waiting to be told what to do.
Some insight: [] We shot this on a shoe-string budget, with a small schedule expecting a short turn-around. I had all 4 commercials ready for the client to approve and deliver within the first 2 weeks but because of unforseen circumstances on the clients side, communication breakdowns occured and my producer and I were left waiting for approvals on things for almost 3 months. However, most of the work was paid for (aside from some of the editing).
IF jobs like these pop up, always make sure to cover yourself legally, or at the very least as a work ethic demand payment up front in full. If for some reason political aspects begin to play into the business end of things like getting paid for your work, you need persistence and follow-through to make sure you get paid. I've learned this the hard way through the years of growing my business from the ground up.
I'm not saying this out of personal aggravation (though there was a little of that). I understand this happens and the catch here is learning not to take things like this personally, it's just business, and in the end whether you get paid or not you have only your sanity. Roll with the punches, don't get angry when they hit you. Keep on trucking, and do what needs to be done.
Tuesday, July 17, 2012
Zombie Apocalypse 2012
Still to come: there are a few other commercial projects I worked on in may i'm awaiting on publishing approval for before I post. Keep an eye out for more behind the scenes and in-depth looks coming soon!
Monday, February 6, 2012
Subject to Change
It's been a long few weeks working on a
big studio project. At this current juncture, Troy and I are in the
main mix and master phase working on a 5 song EP for Chris McClure.
Both Troy and I have been working very hard on this project. We both
have a passion for bringing the best sound possible to the music. Just
what is "the best sound"? This question has so much subjectivity that
even today is always a relevant and somewhat controversial debate
amongst mixing engineers and recording artists, mastering engineers,
even musicians and artists that care to delve into this realm. Let me
start by sharing a very interesting (at least to me) video with you:
As I stated already, what "sounds best" is highly subjective. Subjective to the listening environment, the genre of music, the intended audience. Just as David Byrne talks about in the beginning of the video, it's no accident that the west African music sounds the way it does or is written in such a way that compliments it's listening environment (free field), or that early band music used instruments that could project well in a small venue to be heard well above the ambient noise of the audience dancing and yelling and whatever else it is one would do there.
Fast forward to today and we have such amazing technology to allow us to create, simulate, emulate, even overcome obstacles in achieving just about any type of sonic impact we want, which makes it all the more critical and complex on just about every "job" in this industry. Everyone, even professionals in the industry - have personal tastes when it comes to what sounds pleasing to them. Not just musical genres, but the particular mixing and mastering styles, "sonic signatures" if you will.
Imagine the sound capabilities and quality of the earliest phonograph recordings being the particular sonic signature a modern band wanted to encapsulate their music. I can't vouch for anyone else, but I would assume today's audience would not be pleased by a recording of a modern band that sounded as such.
As a mix engineer, there is a true and mysterious art to getting the recordings to sound the way we expect them to. Today's music is so heavily processed there is rarely any concept of the natural or "raw" sonic impact of what the instruments sound like. I usually hear people say (and I've said it myself too) that when we do our job right we become invisible. Our jobs aren't actually transparent anymore, it's quite the opposite. The post-production desired and even required by modern tastes have created a huge demand for a certain level of "polish" to be recognized by the "mainstream audience".
Take a listen to your favorite band's album. Go ahead, pick one.. take a listen, and tell me if you've heard that band sound EXACTLY the same live. I'm not talking about imperfections in live versus recorded performance, as I'm pretty sure everyone is aware of auto-tune and "time correcting". What I'm referring to is the particular sounds of instruments, their presence in the mix and the ability to hear every instrument clearly.
Live performances have a very very different sound to them. Whether it's a tiny band performing without any PA system in a garage venue or a popular band playing at a huge arena venue, the mixes differ greatly. The sounds between those environments also are very different. Lets take the recording you listened to and imagine hearing that same song performed live. It's almost impossible to get the exact same sonic signature out of each and every instrument, even the performance has to change. Where once a vocalist might have been just above a whisper in your ear in the recording now has to sing much louder to achieve unity and harmony with the song in the context of a live performance. The impact is as David Byrne mentioned: A product of the environment.
Even deeper however, the live performance is still subject to the technical and creative abilities and tools of the mixing engineers; both Front of House: who creates the mix for the audience, and the monitor engineer - who must often create individual mixes for the various performers on stage to hear what they need to perform at their best. The original sound source may sound almost nothing alike when comparing the "raw" to the processed.
So here we are today, with recording technology more easily accessible and available to more of the public than ever before. The landscape of the music world shifting greatly as the industry that arose from it is now subject to change according to the freedom of the masses now able to "do it yourself" where once access and resources were save for the select group of those chosen based on their "sell-ability". The sea of music online and available in stores now is so vast it is almost as if the magic of the impulse buy has left us. People hear demos online of bands that are "less than polished" and it has become so saturated that the likelihood of the audience connecting with it puts them off to the possibility of spending money on a product when they feel it is inferior.
That particular magical allure has faded and people spend less on the impulse buy to pay homage to the artist for their ideas. It may not be the artist's fault at all in fact; the idea may be a great one. However, it may have been poorly executed, or just not right for the particular sonic signature that was achieved. Music is highly emotional, and the sonic impact it has is the driving factor that must be executed precisely or else the emotional impact is lost.
An individual can pick up an instrument, a microphone, and a recording interface to a computer and easily make their ideas into a product available on a global market. That's a lot of power. However, the expectation of the modern audience has also never been higher. We expect to hear perfect music. The best possible representation of the idea or concept that lets the listener transcend the medium and connect with the idea internally - emotionally, intellectually, or otherwise.
I've heard the phrase "loudness war" many times since I've pursued the audio engineering path and today i'm less and less convinced it is simply about that anymore. The revolution of independent freedom from the tradition of the market being closed doors has also put a lot of scrutiny on it. It's both helped and hurt it. I'm more convinced the loudness war isn't as relevant as is the war on education. The technology may be available to just about anyone now, but the education and understanding of how sound and music work are still (if not more) important and no more or less available than before.
I just thought I'd post something in between all the jobs I've been busy with. There will be more updates coming soon as we head in to the final days of the EP project, and should have several video updates for them soon.
I pose a question, and I hope everyone who wishes to leave their answers in the comments below be unafraid of criticism for it. It's your opinion and it is most welcome. Do you think that audio engineers are as much a part of the music now as the artist who wrote and/or performed the material?
(View the conversation page here: www.ted.com/talks/david_byrne )
As I stated already, what "sounds best" is highly subjective. Subjective to the listening environment, the genre of music, the intended audience. Just as David Byrne talks about in the beginning of the video, it's no accident that the west African music sounds the way it does or is written in such a way that compliments it's listening environment (free field), or that early band music used instruments that could project well in a small venue to be heard well above the ambient noise of the audience dancing and yelling and whatever else it is one would do there.
Fast forward to today and we have such amazing technology to allow us to create, simulate, emulate, even overcome obstacles in achieving just about any type of sonic impact we want, which makes it all the more critical and complex on just about every "job" in this industry. Everyone, even professionals in the industry - have personal tastes when it comes to what sounds pleasing to them. Not just musical genres, but the particular mixing and mastering styles, "sonic signatures" if you will.
Imagine the sound capabilities and quality of the earliest phonograph recordings being the particular sonic signature a modern band wanted to encapsulate their music. I can't vouch for anyone else, but I would assume today's audience would not be pleased by a recording of a modern band that sounded as such.
As a mix engineer, there is a true and mysterious art to getting the recordings to sound the way we expect them to. Today's music is so heavily processed there is rarely any concept of the natural or "raw" sonic impact of what the instruments sound like. I usually hear people say (and I've said it myself too) that when we do our job right we become invisible. Our jobs aren't actually transparent anymore, it's quite the opposite. The post-production desired and even required by modern tastes have created a huge demand for a certain level of "polish" to be recognized by the "mainstream audience".
Take a listen to your favorite band's album. Go ahead, pick one.. take a listen, and tell me if you've heard that band sound EXACTLY the same live. I'm not talking about imperfections in live versus recorded performance, as I'm pretty sure everyone is aware of auto-tune and "time correcting". What I'm referring to is the particular sounds of instruments, their presence in the mix and the ability to hear every instrument clearly.
Live performances have a very very different sound to them. Whether it's a tiny band performing without any PA system in a garage venue or a popular band playing at a huge arena venue, the mixes differ greatly. The sounds between those environments also are very different. Lets take the recording you listened to and imagine hearing that same song performed live. It's almost impossible to get the exact same sonic signature out of each and every instrument, even the performance has to change. Where once a vocalist might have been just above a whisper in your ear in the recording now has to sing much louder to achieve unity and harmony with the song in the context of a live performance. The impact is as David Byrne mentioned: A product of the environment.
Even deeper however, the live performance is still subject to the technical and creative abilities and tools of the mixing engineers; both Front of House: who creates the mix for the audience, and the monitor engineer - who must often create individual mixes for the various performers on stage to hear what they need to perform at their best. The original sound source may sound almost nothing alike when comparing the "raw" to the processed.
So here we are today, with recording technology more easily accessible and available to more of the public than ever before. The landscape of the music world shifting greatly as the industry that arose from it is now subject to change according to the freedom of the masses now able to "do it yourself" where once access and resources were save for the select group of those chosen based on their "sell-ability". The sea of music online and available in stores now is so vast it is almost as if the magic of the impulse buy has left us. People hear demos online of bands that are "less than polished" and it has become so saturated that the likelihood of the audience connecting with it puts them off to the possibility of spending money on a product when they feel it is inferior.
That particular magical allure has faded and people spend less on the impulse buy to pay homage to the artist for their ideas. It may not be the artist's fault at all in fact; the idea may be a great one. However, it may have been poorly executed, or just not right for the particular sonic signature that was achieved. Music is highly emotional, and the sonic impact it has is the driving factor that must be executed precisely or else the emotional impact is lost.
An individual can pick up an instrument, a microphone, and a recording interface to a computer and easily make their ideas into a product available on a global market. That's a lot of power. However, the expectation of the modern audience has also never been higher. We expect to hear perfect music. The best possible representation of the idea or concept that lets the listener transcend the medium and connect with the idea internally - emotionally, intellectually, or otherwise.
I've heard the phrase "loudness war" many times since I've pursued the audio engineering path and today i'm less and less convinced it is simply about that anymore. The revolution of independent freedom from the tradition of the market being closed doors has also put a lot of scrutiny on it. It's both helped and hurt it. I'm more convinced the loudness war isn't as relevant as is the war on education. The technology may be available to just about anyone now, but the education and understanding of how sound and music work are still (if not more) important and no more or less available than before.
I just thought I'd post something in between all the jobs I've been busy with. There will be more updates coming soon as we head in to the final days of the EP project, and should have several video updates for them soon.
I pose a question, and I hope everyone who wishes to leave their answers in the comments below be unafraid of criticism for it. It's your opinion and it is most welcome. Do you think that audio engineers are as much a part of the music now as the artist who wrote and/or performed the material?
Tuesday, November 29, 2011
We get some Soul..
This last weekend Troy & I went to Milpitas to film a live performance of Pacific Soul as a favor to a friend of a friend. Wow! This group is a nine-piece band that performs R&B classics and are a really well-rounded, amazing sounding group! Pretty much everyone in the band sings and harmonizes together, Everyone's got a function in the band that plays well.
It was sort of last minute and a little under-communicated, but I think we've pulled it off with a decent look. We shot with the Sony Z1u and the Canon T2i so the look between cameras is vastly different, and is a real pain to get a close match between them. The area they were performing at was inside at a seafood marketplace, and was really dark (no lighting).

The Canon T2i fared well as we simply boosted the ISO to 3200 and the footage came out clean even at high ISO for video. The Shutter speed pretty much sat at 60 and Troy walked around with the T2i getting various close-ups and shots with the shoulder rig we were lucky enough to have borrowed from a friend's production company! Thanks Ian, we'll have it back to you ASAP.
I kept the Z1u stationary and just did simple panning and zooming as best I could while taking notes and monitoring audio. I brought my XLR cables for just such an opportunity to get a direct feed from the Front-of-house (FOH) mixer. This was where I ran into a problem. Once I started monitoring the audio coming into the camera with my headphones I noticed severe compression and limiting and I had already set the camera's gain settings for the XLR inputs to -18dB (the furthest down it would go). I thought maybe it was the camera doing the limiting and maybe just maybe it would be decent.
The next level to the audio problem was the mix itself. The FOH mixer was only creating a mix for the PA system to pump out to the audience. I know how live mixing goes and for a session of this size the PA really just needs to fill in the gaps for the lowest level performers: Keyboardist who has no amp on-stage but has a monitoring speaker by him, the vocalists who also have a couple of monitoring speakers in front of them on the ground. The Bassist has a cab on stage but it's mic'd and instead he's also using a monitoring speaker on the floor. There is a percussionist in the back, and to add to that an electric acoustic guitar being played by one of the singers as well who's got a direct out feeding the mixer. The drummer has some mics on the kit but I couldn't see much as he was behind the stage.
The problem with getting a mix from the FOH is the mix is designed to fill in the mix around the drums which are naturally loud. The keys had a prominent position at teh front of the mix, the vocals collectively sat just behind that, and the drums were barely audible in the mix at all feeding the PA system. the Bass sat just under the Vocals as well and was primarily low-end. However, the mix was either being heavily compressed in the mixer or as an artifact of the signal coming into the camera.
We had no idea how it would turn out in post, but would have to make due with what we got. Before the performance started we had time to set up and talk to the engineer at the FOH mixer. I did notice he had a macbook with Pro Tools ready to rock and the idea was that he was to capture the multitrack performance from the mixer so that the whole session could be mixed properly in post later on. After the performance was over we talked to the engineer again and that was when we were informed there was no capture into Pro Tools! Sometimes these things happen and miscommunication can lead to issues that need troubleshooting later on.
So I'm at home dubbing the tape from the Z1u into Premier Pro and then importing all the captured video from the T2i. Once we started dropping the video on the timeline I got really curious as to the sound of the audio from the T2i. I was greatly surprised by how well it could fill in the mix once i started getting everything in line. I knew I'd have to battle with sync issues as there was no way to lock the two cameras together so that frames and timing would be in sync.
You won't notice it by the video as the lip-sync between both cameras is not noticeably off, but where you will immediately hear it is in the audio tracks lining up. It creates a slight delay affect that's a quick echo. So, this can be simply remedied by bringing the audio into Sonar later on and aligning them so they are in-phase. The natural top-end clarity due to the small diaphragm of the built-in mic in the T2i was able to lend clarity to the mix from the Z1u which was quite muddy, and the lost transients and the natural room tone (the live sound) came back making the drums present again.
My final issue to tackle is creating a good blend between the two audio sources in mixing to get the sound to blend. There is a couple spots where the main audio track (FOH mix) cuts out. First in the very beginning something happens to the mix cutting out.
Then I had Troy run the T2i while I changed tapes because I was running off a previously used tape that still had 30 or so minutes unused. Finally got the fresh tape in and it took a little bit to get to camera speed.
Other mix conditions have to do with Troy's camera position around the band and how it captured the sound of whichever instrument or vocalist is most present. Some positions he took with the camera are directly out of phase with the direct mix as he's standing next to a speaker 180 degrees out of phase with it.
Just barely wrapping up final edit. It's getting even more hectic as there are a couple jobs coming up, and i've been getting contacted about more job opportunities elsewhere.. The immediate agenda for now is to just finish this video and get back to my story-board and novel projects.
It was sort of last minute and a little under-communicated, but I think we've pulled it off with a decent look. We shot with the Sony Z1u and the Canon T2i so the look between cameras is vastly different, and is a real pain to get a close match between them. The area they were performing at was inside at a seafood marketplace, and was really dark (no lighting).

The Canon T2i fared well as we simply boosted the ISO to 3200 and the footage came out clean even at high ISO for video. The Shutter speed pretty much sat at 60 and Troy walked around with the T2i getting various close-ups and shots with the shoulder rig we were lucky enough to have borrowed from a friend's production company! Thanks Ian, we'll have it back to you ASAP.
I kept the Z1u stationary and just did simple panning and zooming as best I could while taking notes and monitoring audio. I brought my XLR cables for just such an opportunity to get a direct feed from the Front-of-house (FOH) mixer. This was where I ran into a problem. Once I started monitoring the audio coming into the camera with my headphones I noticed severe compression and limiting and I had already set the camera's gain settings for the XLR inputs to -18dB (the furthest down it would go). I thought maybe it was the camera doing the limiting and maybe just maybe it would be decent.
 |
| Pulled frame from T2i footage |
 |
| Pulled frame from T2i footage |
 |
| Pulled frame from T2i footage |
 |
| Pulled frame from Z1u footage |
 |
| Pulled frame from Z1u footage |
 |
| Pulled frame from T2i footage |
 |
| The timeline cursor (red bar) you can see the right channel cut out and then the left channel. |
Then I had Troy run the T2i while I changed tapes because I was running off a previously used tape that still had 30 or so minutes unused. Finally got the fresh tape in and it took a little bit to get to camera speed.
 |
| The timeline cursor is where you can see the gap in the main video and audio feed. |
Just barely wrapping up final edit. It's getting even more hectic as there are a couple jobs coming up, and i've been getting contacted about more job opportunities elsewhere.. The immediate agenda for now is to just finish this video and get back to my story-board and novel projects.
Wednesday, October 5, 2011
Zombie Appreciation
I cannot seem to find enough time in the day to get to this thing! The last couple weeks have blasted by.
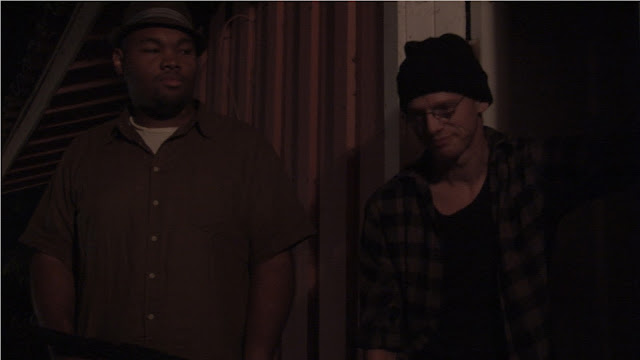
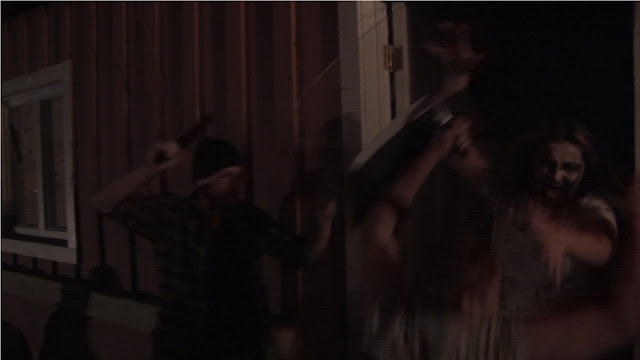
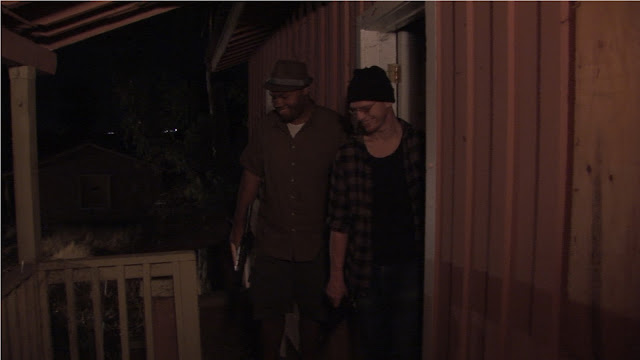
I suppose first things first: The first skit we filmed almost three weeks back was a Zombie skit in collaboration with Underpaid Heroes project with Troy Norcross. The whole thing was improvised on location, not to mention slightly less than legal it turns out!
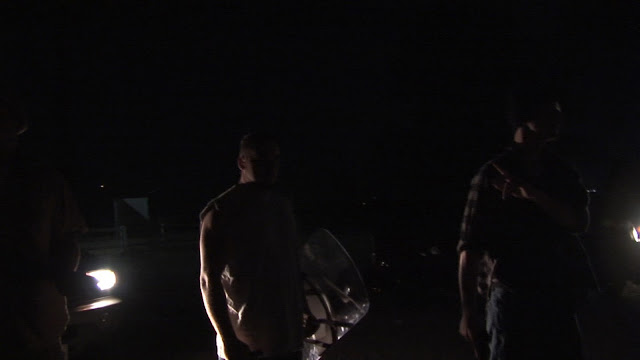
Troy led the skit idea, It took us a while to get makeup done on 2 zombies. A few hours longer than expected running the whole production on account of the Navigator battery dying because of improvised lighting with the cars and 1 mobile spotlight being run from a power inverter (yay for homebrew videography)!
We tried to race through a lot of the shots with a tight time-table. Mok operated the Camera hand-held and I ran the Shotgun mic the same. There was hardly any time to plan out camera angles and really understand what the group wanted to do action-wise.
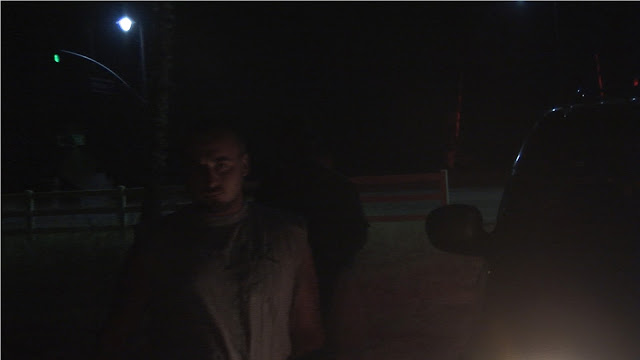
We ran out of time to really make sure we got all the shots we wanted to make the scene complete on account of it being after 3 AM by the time we shot the last bits. The next day we dubbed the tape to Premier and built a rough edit in just 30 minutes.
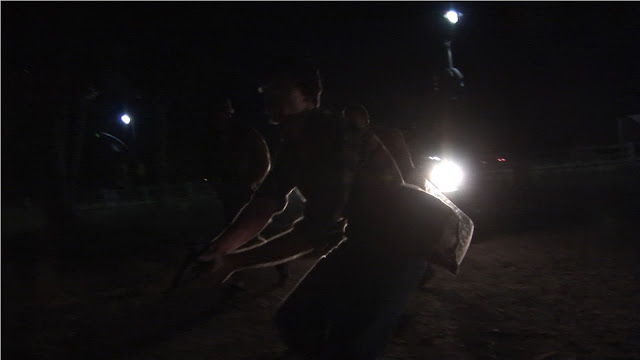
With only a mono audio source to play with there would be a limited pallete of real-world audio to play with and a lot of sound replacement. I refined the rough edit Mok had done and proceeded to the visual FX for several shots that happen in the skit.
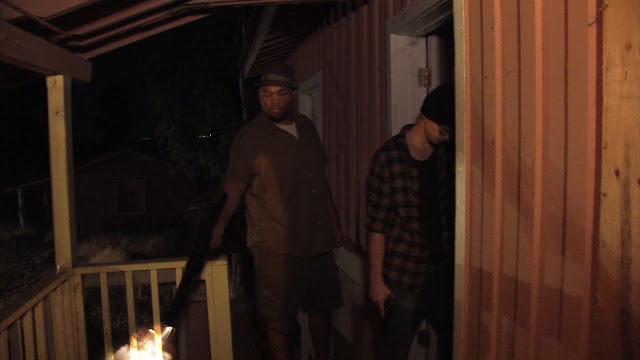
Getting to Picture lock was fairly easy with the minimal VFX shots we had to work on. The final edit still needs bumpers and motion graphics for the titles.
While the picture was pretty much complete aside from those elements I headed to audio and proceeded to break apart the audio.
I quickly went through the audio from each of the takes to pull apart the vocals, and then find useful ambiance to overlay or if it included Foley for footfalls etc. I moved them into timing and copied the audio where necessary. I could only do so much with most of the audio, so I proceeded to then mark spots and add in sound effects for replacement, and then foley and sound effects for enhancement.
First, iZotope's Ozone 4 was used to analyze the entire audio track before any noise reduction was applied to capture the EQ profile of the Rode NTG-3 mic's on-location audio. The next step was the most time consuming.
I had to go through one clip at a time for each cut I made in the timeline to analyze and apply noise reduction for each separate take that followed the take from the video. Once the noise profile was captured for that take, I could simply copy the plugin to the next clip I cut. The plugin is very processor intensive so I had to bounce each clip after the noise reduction was applied.
We also had to replace quite a bit of Voice work from the on-location audio as it was too compressed and the impact noises with the gravel and dirt muddy up the mix. I setup my shotgun mic outside my room and had everyone record their parts to the video. I then applied the Ozone EQ matching profiles to the new material.
I still have to head into surround mix, and compose the underscore to the skit and then apply the final film grading and review before it's done.
So, I have to get back to my busy schedule. I will definitely be adding more up very soon of the other projects I've been working on. Now, off to gym!
I suppose first things first: The first skit we filmed almost three weeks back was a Zombie skit in collaboration with Underpaid Heroes project with Troy Norcross. The whole thing was improvised on location, not to mention slightly less than legal it turns out!
Troy led the skit idea, It took us a while to get makeup done on 2 zombies. A few hours longer than expected running the whole production on account of the Navigator battery dying because of improvised lighting with the cars and 1 mobile spotlight being run from a power inverter (yay for homebrew videography)!
We tried to race through a lot of the shots with a tight time-table. Mok operated the Camera hand-held and I ran the Shotgun mic the same. There was hardly any time to plan out camera angles and really understand what the group wanted to do action-wise.
We ran out of time to really make sure we got all the shots we wanted to make the scene complete on account of it being after 3 AM by the time we shot the last bits. The next day we dubbed the tape to Premier and built a rough edit in just 30 minutes.
With only a mono audio source to play with there would be a limited pallete of real-world audio to play with and a lot of sound replacement. I refined the rough edit Mok had done and proceeded to the visual FX for several shots that happen in the skit.
Getting to Picture lock was fairly easy with the minimal VFX shots we had to work on. The final edit still needs bumpers and motion graphics for the titles.
While the picture was pretty much complete aside from those elements I headed to audio and proceeded to break apart the audio.
I quickly went through the audio from each of the takes to pull apart the vocals, and then find useful ambiance to overlay or if it included Foley for footfalls etc. I moved them into timing and copied the audio where necessary. I could only do so much with most of the audio, so I proceeded to then mark spots and add in sound effects for replacement, and then foley and sound effects for enhancement.
First, iZotope's Ozone 4 was used to analyze the entire audio track before any noise reduction was applied to capture the EQ profile of the Rode NTG-3 mic's on-location audio. The next step was the most time consuming.
I had to go through one clip at a time for each cut I made in the timeline to analyze and apply noise reduction for each separate take that followed the take from the video. Once the noise profile was captured for that take, I could simply copy the plugin to the next clip I cut. The plugin is very processor intensive so I had to bounce each clip after the noise reduction was applied.
We also had to replace quite a bit of Voice work from the on-location audio as it was too compressed and the impact noises with the gravel and dirt muddy up the mix. I setup my shotgun mic outside my room and had everyone record their parts to the video. I then applied the Ozone EQ matching profiles to the new material.
I still have to head into surround mix, and compose the underscore to the skit and then apply the final film grading and review before it's done.
 |
| Not sure if zombie is zombie or clown... |
 |
| fast zombie = fast... |
 |
| Hit the deck! |
 |
| Kaplow! |
 |
| Who plow? |
 |
| Homie don't play dat. |
 |
| Horror scene, or eerie homo-erotic love scene? |
 |
| Yup, eerie homo-erotic love scene.. |
So, I have to get back to my busy schedule. I will definitely be adding more up very soon of the other projects I've been working on. Now, off to gym!
Subscribe to:
Posts (Atom)